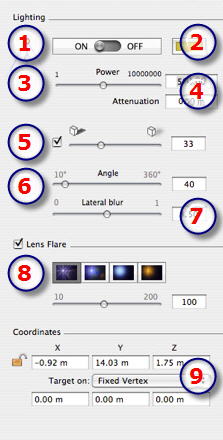
- On/Off
- Color:
- Double click to modify the source color.
- Source power.
- Values from 1 to 1,000,000. Move the slider to change the power or enter a value.
- Attenuation Distance
- Calculates the attenuation distance for the lighting power.
- Between the attenuation distance and source, the lighting power remains constant and at maximum.
- The distance beyond distance A corresponds to the gradual diminishing of lighting power at 1/d². When the attenuation value equals 0, the light diminishes at 1/ d² beginning at the light source.
- Enter the distance in the numerical field (current unit).
 NB: in this area, the illumination principle is based on reality. The closer an object is placed to the light source, the more illuminated it appears.
- Shadow slider has a value range from hard to soft.
- Activate/Deactivate Shadows: Click on the box to check it.
- Change the Lighting Angle:
- By sliding from 10 to 360° or by typing in a numerical value.
- Example: A value of 360° provides an omnidirectional light. 120° produces a spot light.
- Shadow lateral blur:
- sharpness slider on the edge of the illuminated area. Values from 0 (diffuse area between the shadow area and the illuminated area) to 1 (straight limit). Accepts a numerical value.
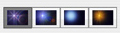
- Lens Flare:
- Activate/Deactivate: Click on the box to check it.
- Choose effect: Click on one of the thumbnails:
- Halo Power: Move the slider or type in a value between 10 and 200%.
- X, Y, Z coordinates: For the position of the light source and its target.
- Clicking on
 locks them and clicking on locks them and clicking on  unlocks them. unlocks them.
- Target on: Choose between target on a fixed vertex or on an object defines as target.
|
 13 - The Lights Inspector